


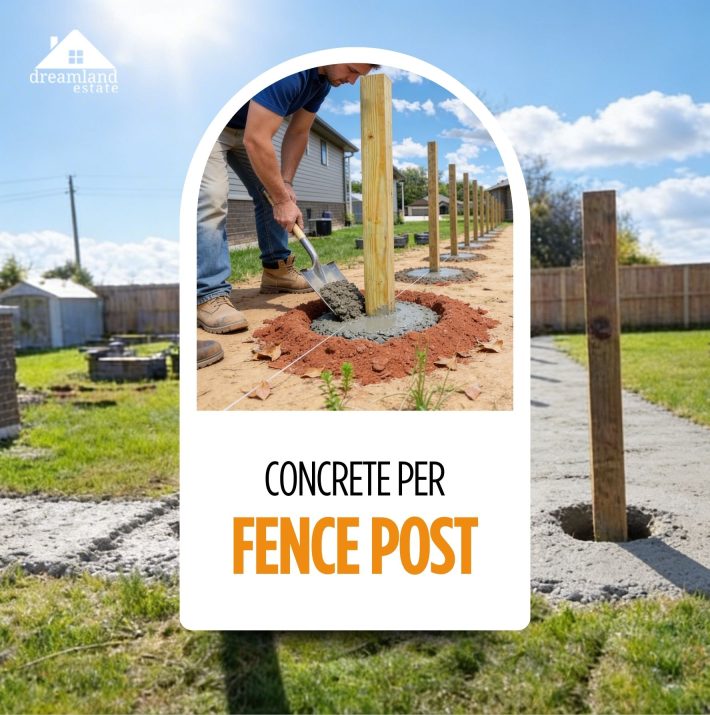
How Much Concrete Per Fence Post? The “1/3 Rule” Pros Use For Life-Long Stability
So, you want to fix up the fence in your backyard? That’s exactly how I felt!
A fence looks like an easy project until you are down on your knees in the dirt, not knowing whether you have just dug a hole for a fence post or a coffin for your weekend plans.
The secret to a long-lasting fence is mixing concrete perfectly!
Basically, there are a couple of rules that make everything turn out perfectly. The most common rule is your hole should be deep enough to get your post 1/3 to 1/2 of its height above ground.
As for the width, it should be three times the post’s diameter. A regular 4×4 post will come with a recommendation of two 80lb bags of Quikrete or Sakrete per hole.
Of course, things get tricky when you have soft soil or freezing winters, but you mustn’t worry. We will do the math so your fence is solid as a rock for years to come.
Why Concrete Matters More Than You Think?
Concrete is something like your fence’s “anchor”, a backyard investment that does not become a leaning disaster thanks to it.
Many people think it is a heavy filler, but actually, it is the one doing the heavy lifting all the time.
If you don’t have a sufficient amount of it, just a strong wind or a very rainy week can destroy your fence, and you will have to worry about how to fix it.
Concrete gives the fence the lateral strength that is necessary to stand against the “sail effect” (when the fence panels are pushed by the wind like the sails of a boat).
In addition, it leaves a firm imprint that stops the post from gradually sinking into the ground.
Nonetheless, there is also a good point to the situation. You don’t want to make your yard look like a parking lot, but if you skimp now, in two years you will have to dig it all up and start over.
Here is what I mean by that: a perfect balance between rock, solid stability and DIY efficiency.
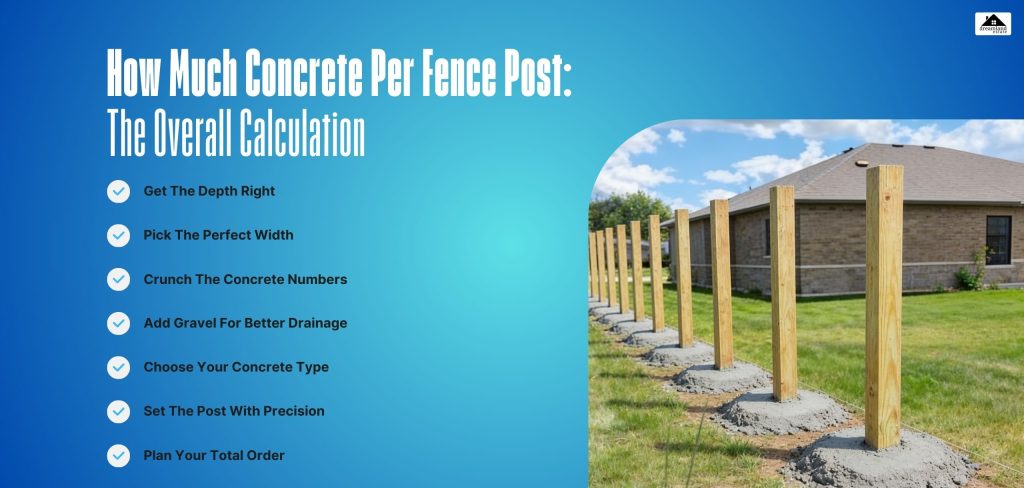
How Much Concrete Per Fence Post: The Overall Calculation
It is not a bad idea to pause and familiarise yourself with the fundamentals even before you start burying holes and loading concrete bags in your wheelbarrow.
A bit of forethought at this point may save you time, money, and a great deal of frustration in the future.
While working on my fence, I found that if you break the whole procedure into simple stages, it becomes easy enough to handle. So let us follow the steps one by one.
Step 1: Get The Depth Right
It is necessary to bury your fence deep enough to ensure it will not lean.
Basically, the depth of your hole should be one-third of the total height of the post in your fence.
If your area experiences freezing ground, digging below the frost line is essential.
- For a 6-foot fence, it is advisable to use an 8-foot post and to bury 2 feet of it.
- For a 4-foot fence, consider getting a 6-foot post and bury 2 feet of it.
Remember, to avoid your posts “heaving” or popping out of the frozen ground in winter, refer to a Frost Depth Map from the NRCS.
Step 2: Pick The Perfect Width
Many people dig holes that are too skinny, but width provides the stability your fence needs against the wind.
A wider hole creates a heavy base that acts like an anchor for your post. This is especially important for gate posts that take a lot of stress.
- The 3x Rule: Make the hole diameter 3 times the post width.
- 4×4 Posts: Dig a hole that is 10 to 12 inches wide.
- Tools: Use a Post Hole Digger from The Home Depot to keep the walls straight and the bottom clean for the best support.
Step 3: Crunch The Concrete Numbers
Calculating the volume sounds like a math test, but it is quite simple. Most standard holes require a few bags to fill.
Since a 50-pound bag of mix takes up little space, you will likely need more than you think. Always buy a little extra just in case of spills.
- The Math: A 12-inch-wide, 2-foot-deep hole needs about 1.57 cubic feet.
- Bag Count: Plan for 3 bags (50lb) or 2 bags (80lb) per post.
Pro Tip: Use a Quikrete Concrete Calculator to find the exact total for your whole yard. This helps you avoid multiple trips to the store.
Step 4: Add Gravel For Better Drainage
Before you even think about pouring concrete, you need to prep the bottom of your hole with gravel.
Adding about 4 to 6 inches of crushed stone provides a solid foundation and a place for water to go.
Without it, water will trap itself against the bottom of your post, leading to rot or rust over time.
- Avoid Rot: Gravel keeps the wood from sitting in a puddle of mud.
- Prevent Shifting: It creates a firm base that won’t compress like loose soil.
Expert Tip: Use all-purpose gravel from Lowe’s to ensure your fence lasts for decades, not just a few seasons.
Step 5: Choose Your Concrete Type
You have two main choices when buying your mix: fast-setting or standard. Fast-setting concrete is a favourite for DIY fans because it requires much less work and gear.
You can usually pour it into the hole dry and simply add water on top. The standard mix is cheaper but requires a wheelbarrow for mixing.
- Fast-Setting: Sets in 20–40 minutes; no mixing required in a tub.
- Standard Mix: Stronger and cheaper, but you must mix it with water first.
Expert Advice: Use Quikrete Fast-Setting Concrete if you want to finish the project in a single afternoon without breaking your back.
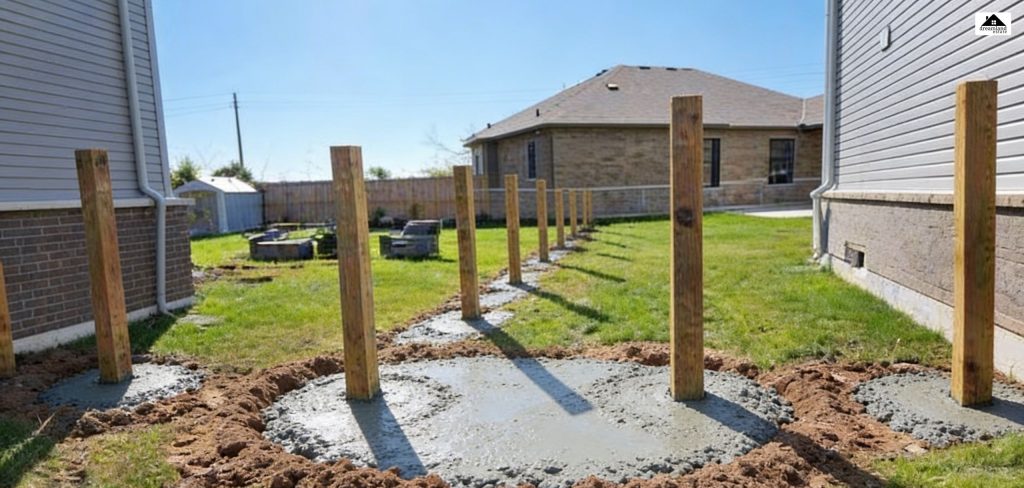
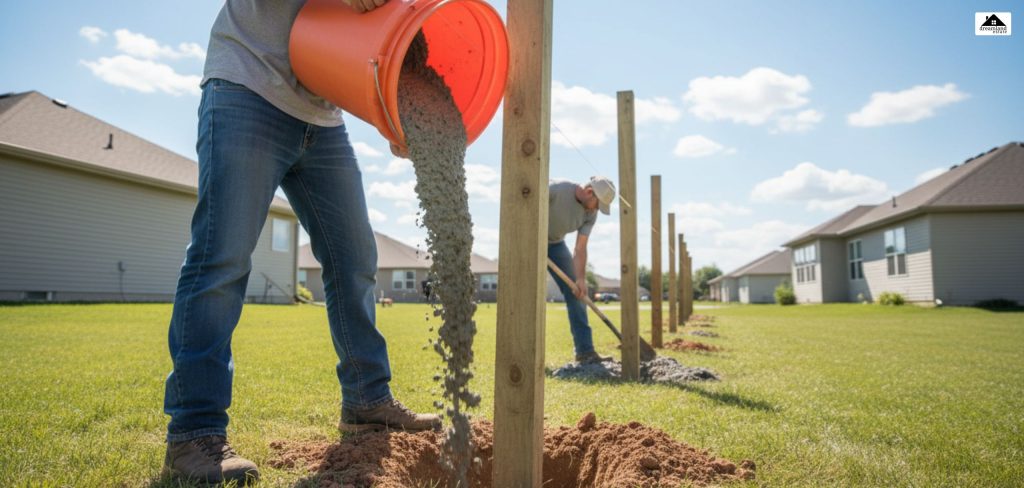
Step 6: Set The Post With Precision
The order in which you work matters if you want a straight fence. Once the post is in the hole with the gravel, you must check that it is “plumb” (perfectly vertical) using a level.
Check two adjacent sides of the post to make sure it isn’t leaning in any direction before you pour.
- The Workflow: Dig, add gravel, place the post, level it, then pour.
- The Finish: Slope the top of the wet concrete away from the post so rain runs off.
- Curing Time: Give the concrete at least 24 to 48 hours to harden completely before you start nailing heavy fence panels to the posts.
Step 7: Plan Your Total Order
Calculating for one post is easy, but the total for a whole yard can be a shock. If you have a large property, the weight of the concrete alone is a massive factor.
A typical project might require dozens of bags, which can easily weigh over 3,000 pounds in total.
- Do the Math: Multiply your “bags per post” by the total number of posts.
- Weight Check: Ensure your truck can handle the load. 60 bags of concrete are a lot for a standard pickup.
Expert Tip: If you need more than 40 bags, consider having The Home Depot deliver the pallets directly to your driveway.
Don’t Forget The “Hidden” Math: Post Displacement
When I first started fixing up my yard, I believed that figuring out how much cement was needed per post was as easy as just measuring the hole.
However, here is professional advice I uncovered after a few trial-and-error experiments: the post itself occupies the space!
If you fail to subtract the volume of the wood or metal post, you will end up with a large amount of leftover wet concrete and an afternoon full of frustration.
Professional installers use an exact formula to save money and avoid waste; really, once you master it, it becomes a total game-changer for any DIYer.
1. The Cylinder Formula
Imagine your hole as a large cylinder. The maths is
Volume equals pi times radius squared times height (V = πr²h)
2. The Secret Step
A regular 4×4 wood post (which is in fact 3.5 inches wide) takes up approximately 0.21 cubic feet of space in a 30-inch-deep hole.
You have to subtract this from your total hole volume.
3. The Real Total
For a 10-inch-wide, 30-inch-deep hole, the total volume is approximately 1.36 cubic feet. Once you subtract 0.21 for the post, you will only require around 1.15 cubic feet of concrete.
Since a typical 50-pound bag of mix yields about 0.375 cubic feet, you need exactly three bags per post.
I have discovered that following this particular method to the letter helps me plan my budget very accurately.
It doesn’t matter if you are installing heavy privacy panels or lightweight hog wire fencing.
Spending just five minutes to do this math will keep you from making those annoying extra trips to the hardware store in the middle of the workday.
Believe me, your back (and your truck) will thank you for not overbuying!
Is Concrete Always Necessary for Your Fence?
Although concrete remains the benchmark for a solid fence, it is not the only solution for fence installation.
At times, avoiding the heavy bags of concrete can save you a lot of time and energy. Usually, these alternatives work best for small projects or very well-drained soil.
If you are merely installing a garden border or a temporary fence for dogs, you could try these options.
- Packed gravel: You fill the hole with a few layers of crushed stone and tightly pack it. It gives wood posts great drainage.
- Expanding foam: Products such as Sika PostFix by Sika are very light and set in a few minutes. You only need to mix a small bag and then pour it in.
- Metal anchors: These are ground, driven spikes.
They are ideal for mailboxes or small decorative picket fences. You could choose from the options listed above.
However, concrete is still the king of stability. If you are in a high-wind area or constructing a tall, heavy privacy fence, go with concrete.
It is the heavy-duty anchor that will keep your fence upright for decades.
Using foam or gravel on a massive fence might lead to leaning or wobbling after the first big storm hits your neighbourhood.
What Are The Common Mistakes That You Must Avoid?
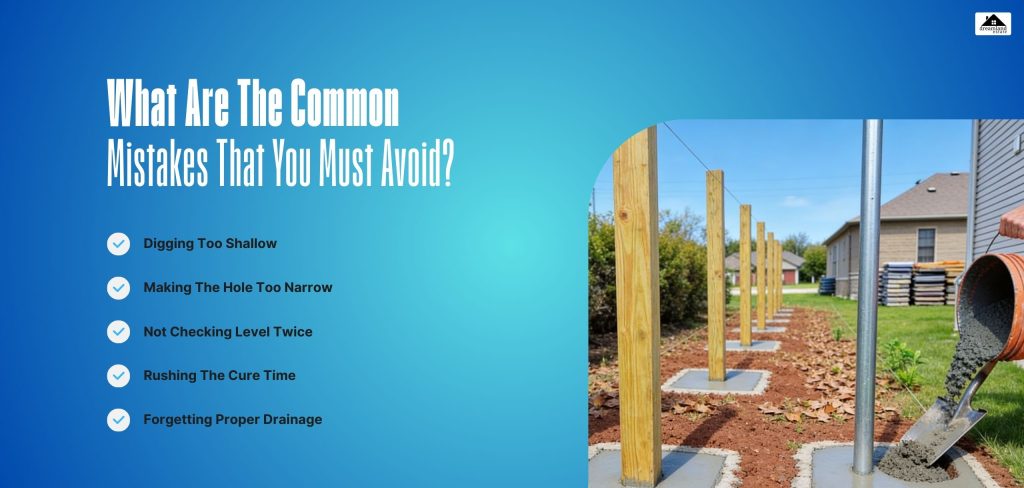
Let me spare you a giant headache later on. Even though constructing a fence may seem simple, small errors can lead to major problems.
If you rush the job, a fence that leans might be what you’ll have only after one season.
Here are the major errors I found during my own DIY project.
1. Digging Too Shallow
This is the mistake most people make. If your posts go that deep, they will move with every gust of wind.
Besides, after a heavy downpour, posts could lean over if the soil is soft and the rain has washed away the posts’ holding power.
To protect yourself, always be one-third of the way down the goal.
2. Making The Hole Too Narrow
Concrete must have enough room to make a strong, heavy anchor. If the hole is too narrow, there is not enough concrete for the earth to be gripped properly.
A narrow base is weak and cannot support the weight of a fence panel. Let your post have some breathing room.
3. Not Checking Level Twice
On the surface, fence posts may seem perfectly aligned to the naked eye until they are firmly set in the concrete.
Never rely on getting the post straight with just one check. Use a level on two sides of the post before the concrete hardens.
After the mix sets, if the post is going to be misaligned, the only way to correct it is by digging it out.
4. Rushing The Cure Time
It feels as if concrete is as hard as a rock after just an hour, but inside, it is still very weak. If you start nailing heavy boards too soon, the vibrations can crack the base just laid.
Wait patiently for at least 24 hours before continuing to use the fence. Allowing it to set will give it maximum strength.
5. Forgetting Proper Drainage
Water is the silent enemy of every fence. If you leave out the gravel or don’t slope the concrete at the top, water will gather and stagnate around the base.
This will cause wood to rot and metal to rust. Keeping the posts dry is the most effective way to make them last longer.
What About The Metal Posts?
Metal posts are an excellent alternative as they won’t decay like wooden ones. They tend to be thinner, thus allowing you to dig even a slightly narrower hole.
Still, don’t be deceived by their slim appearance. They are still required to be deeply and heavily anchored to withstand the weight of the fence and the force of the wind.
- Size Matters: The width of a metal post is generally only 2 or 2.5 inches, so your hole can be around 6 to 8 inches in diameter.
- Keep it Deep: The one-third rule for depth should still be observed. Deepening mainly prevents the post from bending or jumping out of the soil.
- Concrete Savings: Since the holes are narrower, less concrete will be used. You may only need 1 or 2 bags of Quikrete per post, rather than 3.
Metal is extremely strong, but it can still settle if the base isn’t prepared. A few inches of gravel should be put at the bottom, as with wood.
This keeps the metal from contacting moisture and gives the post a flat surface to lie on.
In case you are constructing a chain link fence, refer to The Home Depot’s Chain Link Fence Guide for fencing spacing tips.
Quick Guide: Common Fence Post-Depth Sizes
If you want a shortcut for your planning, this handy chart from Northland Fence shows exactly how many bags you need based on your post size and hole depth.
It’s a great way to double-check your math before heading to the store.
| Post Diameter (Inches) | Post Hole Depth (Inches) | Number of 50 lb. Bags of Concrete |
|---|---|---|
| 3 | 12–18 | 1–2 |
| 3 | 16–24 | 1–2 |
| 4 | 20–30 | 3–4 |
| 4 | 24–36 | 4–5 |
| 6 | 32–48 | 10–11 |
- Small Posts: For standard 3-inch metal or wood posts, you can get away with just a bag or two.
- Medium Posts: Most residential 4-inch posts will need around 3 to 5 bags, depending on how deep you dig.
- Heavy Duty: Large 6-inch posts for big gates or corners require a massive amount of concrete—up to 11 bags!
Pro Tip: Always look at the higher number in the “Bags” column to make sure you have enough to finish the job.
Final Thoughts From Someone Who Just Did It!
Setting fence posts is one of those projects that prima facie seem simple, but the real magic lies in the prep work.
After spending many a weekend in my yard, I have come to understand that it is all about the math.
The actual pouring of the concrete is the easy part. The planning determines whether your fence will stay straight for 15 years or lean after the first big storm.
- Dig Deep: Always strive for that one-third depth.
- Go Wide: Allow your concrete enough space to attach to the ground.
- Do the Math: Figure out your volume so that you don’t run out.
- Be Patient: Give the concrete time to dry completely before installing the panels.
It is always so gratifying to gaze at a strong, professional-grade fence and know that you made it happen.
As a DIYer, you can totally do this! Just get your concrete sorted first, and you’ll be good to go.


Leave A Reply